How to Fix Your Socks
Now, I ask you, however would I know how to fix socks? Because I make a lot of mistakes. I mean it, I must have done every back-aswards thing you can do when knitting a sock. I'm not particularly fond of frogging and I'm a Virgo (you know, those most irritating perfectionists of the zodiac). This has led to a certain amount of tension. Do I frustrate myself by starting over or by leaving a mistake?
Well, who says it's and either/or situation? There's a way to fix most anything, and I've found it. The hard way.
But this weekend, when I was chugging away on the second sock (I don't have second sock syndrome; in fact, I usually whip through the second sock double time) and this happened:
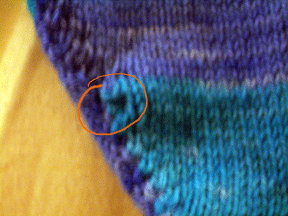
Okay, I'm used to holes from all sorts of causes in my sock heels. But, what's this? A pucker? How can there be a pucker? There just can't be a pucker. I saw this kind of lump thing in my heel, but chose to knit on. There was no hole, so surely nothing was messed up and this thing would straighten itself out as I knit.
Wrong.
An inch later, there was still a pucker. I tinked. Really, I tinked an inch of 76 sts and tried again. As I knit on, I checked my heel. Pucker. How could this be? What new kind of torment had I invented that I apparently could not refrain from repeating? What on earth could make a heel pucker - twice. I couldn't leave this thing - I'm not princess, but I hate wrinkles in my socks, never mind lumps. This heel had to come out - I'd take it all the way out and start over. No more puckers!
No way I was going to frog the whole sock for a lumpy heel. I got out a circular in a smaller diameter and carefully, slowly, threaded it through the last round before the heel started. I was very careful to pick up the second leg of the V of each stitch. It doesn't matter if it's the first or second leg, just that it's always the same one. I prefer even numbers for no reason whatsoever, so I chose the second leg.
Note: pick up means just slide your needle under the stitch - not pick up and knit!

Now I had two needles in one sock. I checked every stitch again. I checked to be sure I hadn't missed any - especially at the beginning/end of the round. Then, I took a deep breath and...
pulled out the needle and unravelled the stitches.
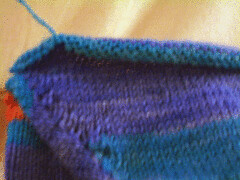
Finally, I ended up with this:
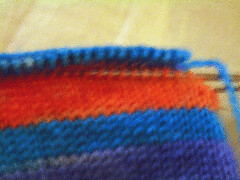
Now, in order to start my heel over, I needed to be sure that my knitting was set up properly - the needles parallel, points to the right, yarn attached to the first stitch on the back needle. If not, it's easy enought to set it right. It's a circular needle, so stitches easily slide from one end to the other. Look at your knitting and your working yarn and start slipping stitches around until they end up in their assigned places. It sounds much trickier than it is!
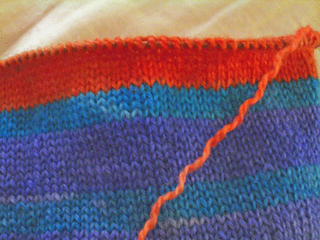
The coral working yarn is coming over from the back needle. Ready to go!
By the way, I finally figured out where the pucker came from to begin with. It's a short row heel and when I long rowed, I went too far on one row. Essentially, this method of long-rowing has you knitting across the heel and working the last heel stitch together with the first stitch of left-unworked stitches (the other side of the angle). I knit too far, crossing into the left behind stitches and then made my decrease. Pucker.
When I redid the heel the first time, I got another pucker. Another way. The decreases involve slipping a stitch, picking up a stitch in the row below the next stitch and then working these two stitches together. When I tinked, I didn't get the loop from the stitch in the row below back into the row below. Too many stitches smushed together gave me another lump.
Gave me fits trying to figure it out! But I fixed it.




1 Comments:
Oh now this is very helpful for us first time knitters. And actually really helpful if I ever need to rip something out to a certain spot... Thanks for the little guide...
Post a Comment
<< Home